Plug the live installer flash drive into your computer
Step 1: Choose the live installer that you just plugged in. Refresh if necessary
Step 2: Choose the iso file you just downloaded. Don't mind the compatibility note
Step 3: Keep persistence at 0MB
You may have to change it to a random number and
back to 0
Step 4: All of these are optional. I choose to hide created files and only format if I haven't already
Hit the lightning icon and wait 10-30 minutes for the process to complete
Step 2) Boot into the live installer
Restart your computer with the live installer plugged in
Press F12 while your computer brand's name is on the screen to get to the boot menu
This may be different on other computers. It
works for Dell and Acer
Select whatever doesn't have "Windows" in it
You may be prompted to select an EFI/UEFI file/device. If so,
there's two options. Try BOOT/grub/grubx64.efi or the other .efi file.
In Acer, you have to "Select an UEFI file as trusted for executing".
Go into the BIOS settings (press F2 at boot time), navigate to "Security", and go to
"Select an UEFI file as trusted for executing". Select the BOOT/grub/grubx64.efi
or other efi file
An Ubuntu window should appear. Select the live option
Step 3) Install Ubuntu onto the target drive
Plug in the target drive
Partition the target drive
Open “GParted”. It should be automatically installed on all ubuntu distros otherwise open the terminal and run “sudo apt install gparted”
Select the target drive in the top right of GParted. Look for the size of your target drive
Right click and remove all existing partitions on your target drive
Right click and create a new partition with ext4. You can choose the size, but I recommend 30-40. Name it as “/” for future reference.
Right click and create a new partition with linux-swap at 2x your RAM
Right click and create the last partition with the remaining space and name it “/home” for future reference
Go through the installation
Go to the desktop and click on “Install Ubuntu ____”
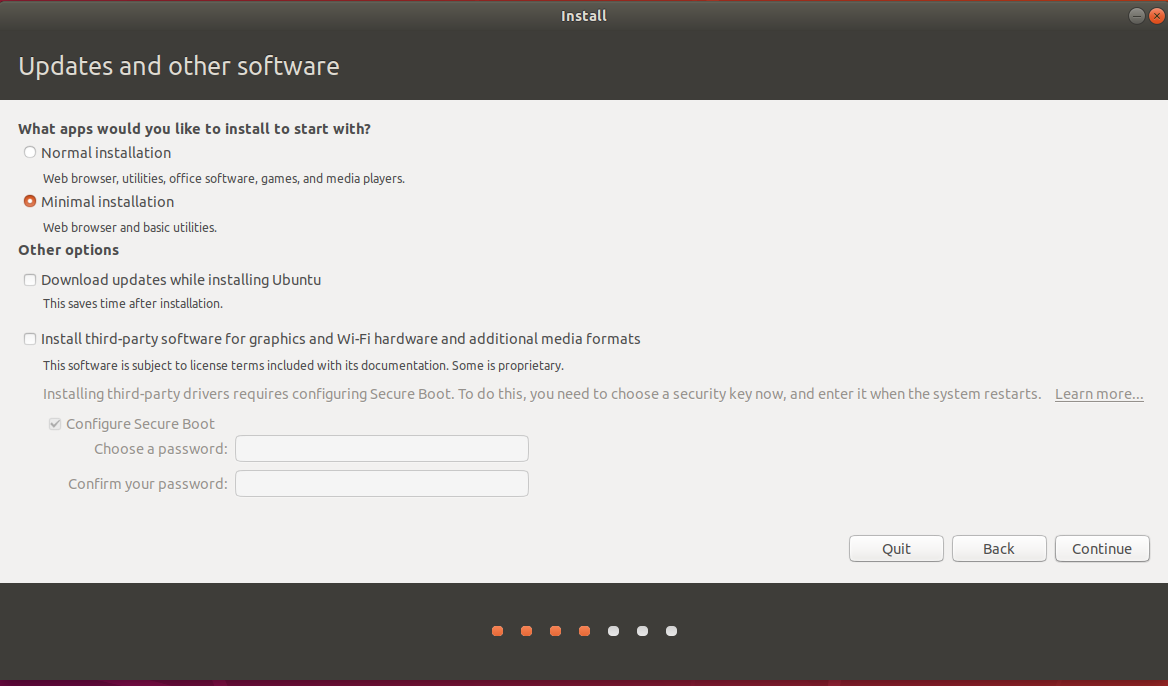
Check minimal or normal and installation and whether or not you want to install updates before or after the installation.
I prefer after since I do a ton of
installations afterwards anyways. Plus if the installation
hangs, it means something went wrong i(which has happened to
me), and I don’t confuse it for downloading lots of updates.
If you’re confident this process will work, then there’s no
harm in doing it
Check whether or not you want third-party software
I prefer no since I can install it afterward.
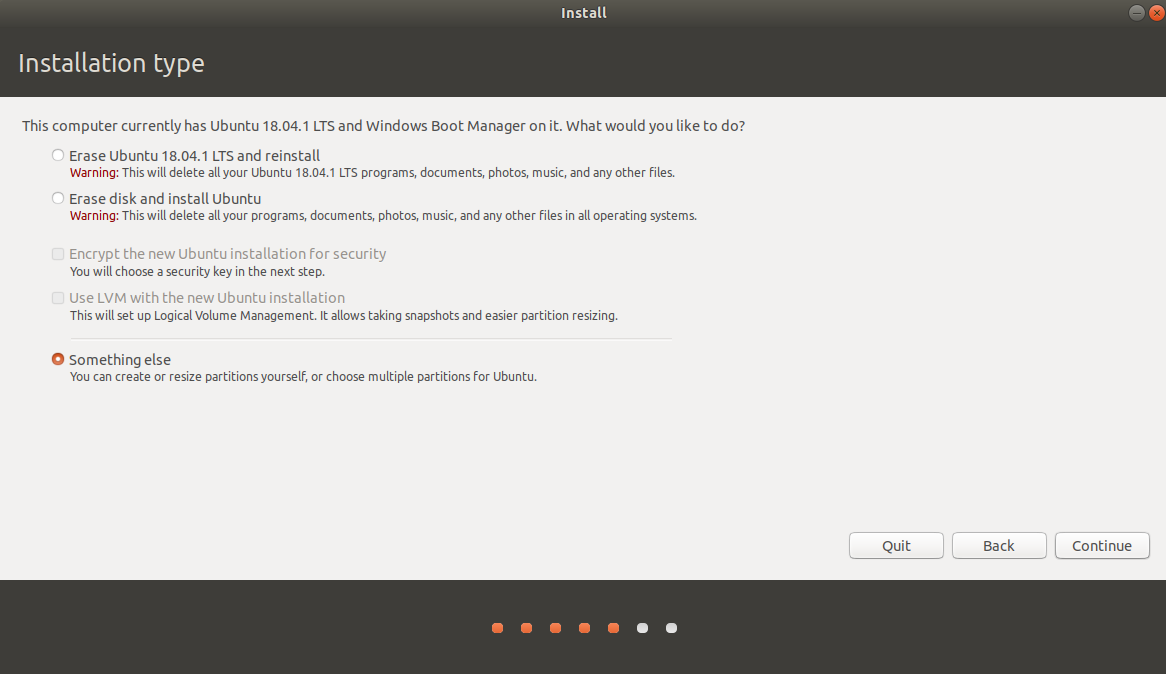
In the next window, do not overwrite your current OS. Select the last option, “Something else”
In the menu on the bottom, select your target drive
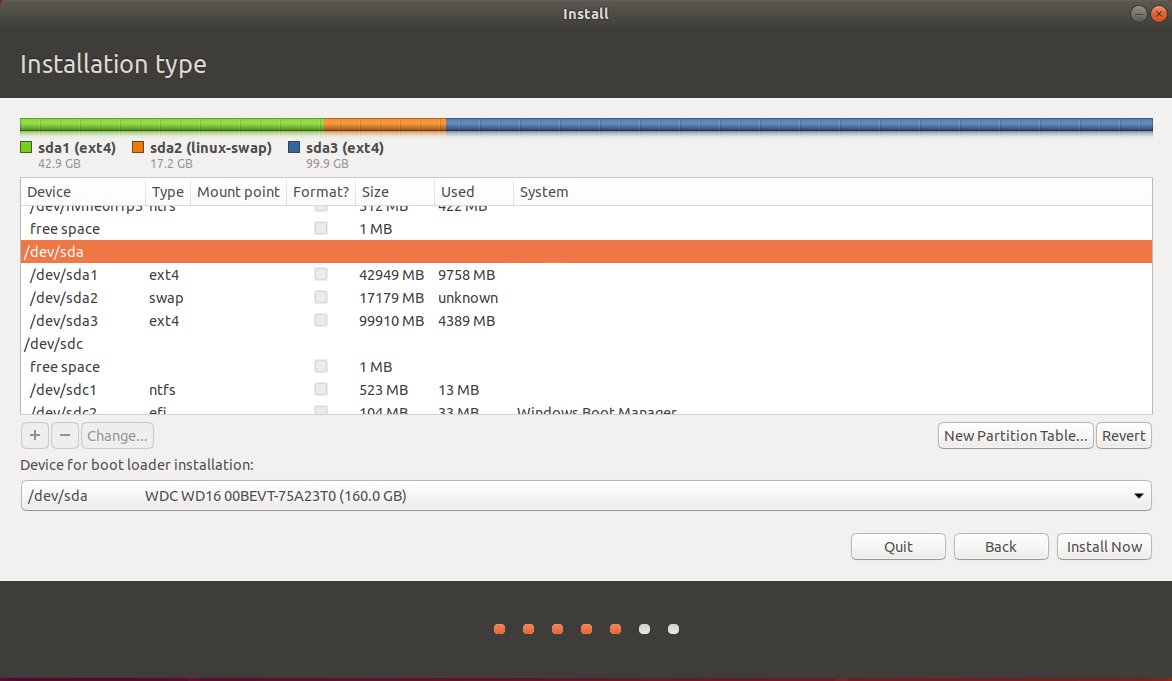
In the scrolling list of partitions in the middle, find your target drive
Right click your “/” partition, check the format box, and select use as “/” (root)
Right click the linux-swap partition and make sure it’s set at linux-swap
Right click the “/home” partition, check the format box, and select use as “/home”
Click continue
this is a notable spot for the process to hang
Select your location
Enter your login details and choose if you want it to log in automatically
Wait for everything to download and finish
Finished! Shut down your computer
NOTE: I’ve had issues partitioning within the
installer itself. I would constantly get an error saying
that the partition is offset at X number of bytes which
could lead to poor performance. For that reason, I choose to
partition it using GParted ahead of time.
Step 4) Shut down, remove live installer, Turn on and choose the target drive from the boot menu
In the newest version of Ubuntu (18.04), there is sometimes a screen saying something like
"Unplug the live installer and reboot." As of 9/23/2018, I don't know which key combination
actually
reboots the computer after unplugging the live installer. Exit, poweroff, and shutdown don't
work.
It seems to be Ctrl+C, but that has been untested.